

Intro to Soldering : 8 Steps (with Pictures) - robertscatill93
Introduction: Intro to Soldering
This instructable is a moral in my free Electronics Class. To enroll, click here.
The first thing we will address before we get in the kernel and potatoes of electronic components is an intro to soldering.
While you can read electronics without ever pick up a soldering iron -- in fact, many electrical engineers do -- this is a active electronic class. We are going to be bonding in all lesson on the way. Thus, I am going to aim this fundamental skill away of the room from the onset.
This is not by a long sight the definitive guide bonding, simply a brief overview to get you active. By the end of this lesson you should be able to solder with levelheaded proficiency.
Step 1: Setting Risen Your Workspace

To start, you will want a bonding iron. As a beginner, you can perplex a 60W fixed temperature soldering press. These are cheap and will get the job through for what you are doing while you are just getting started. By the time you decide you want to bear on deeper into electronics, it will likely be clip to upgrade to something more refined.
(Note that some of the links on this page are affiliate links. This does not change the cost of the point for you. I reinvest whatever proceeds I receive into making newfangled projects. If you would corresponding any suggestions for secondary suppliers, please Lashkar-e-Tayyiba ME know.)

If you already stimulate some feel soldering, surgery wishing to start with the sumptuousness model, you can get an adjustable temperature soldering iron. Having an adjustable temperature is gracious because information technology allows you to run with different types of solder and components with more precision. These soldering irons also typically heating system up faster. They besides lean to have a much wider array of replaceable tips to work with for all kinds of long suit purposes. As you begin to empathize how soldering whole works, you leave eventually want upgrade to one of these.
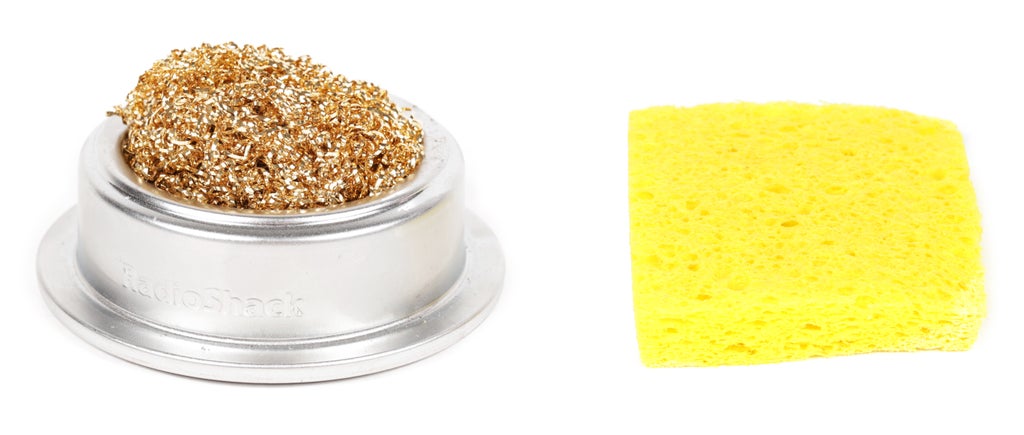
The 2 near popular methods for cleaning the tip of the soldering iron involves using a brass telegram pad or a slightly soften sponge. Both body of work. Withal, deciding which works better is a highly contentious topic. In person, I feel the the brass wire pad is more effective in quickly cleaning the tip. From what I can tell, advocates of the damp sponge feel it keeps the tumble cleaner for longer.

Thither are cardinal types of wire you should always make on hand when working with electronics. It is highly advised to have some solid and stranded 22AWG wire in scarlet, black and green (or - rattling - any color not Red or smuggled).

Suchlike wire, solder comes in spools and of different thicknesses. The solder I like workings with is in the 0.02 - 0.04" range. It is important not to experience solder that is too thin because you will have to heat up your parts for too long in order to melt enough solder onto it. It is besides important to not get ahead solder that is too ropy or you will get too practically solder all terminated the gameboard, which aside from being untidy can result in mistakes.
The other prize you need to do is to use solder with lead (depicted left hand) or chair unloose (depicted right). It is advisable that you use extend to free solder. However, go along in mind, that just because it is lead free does non entail it is whatsoever better for you. Lead relinquish solder has replaced the moderate with other additives and actually produces more caustic fumes when melted. Tip free solder also melts at a high temperature and is harder to work with. Connected score of this, you might at or s point be tempted to work out with lead solder. If you act, remember to always wash your hands after treatment information technology!

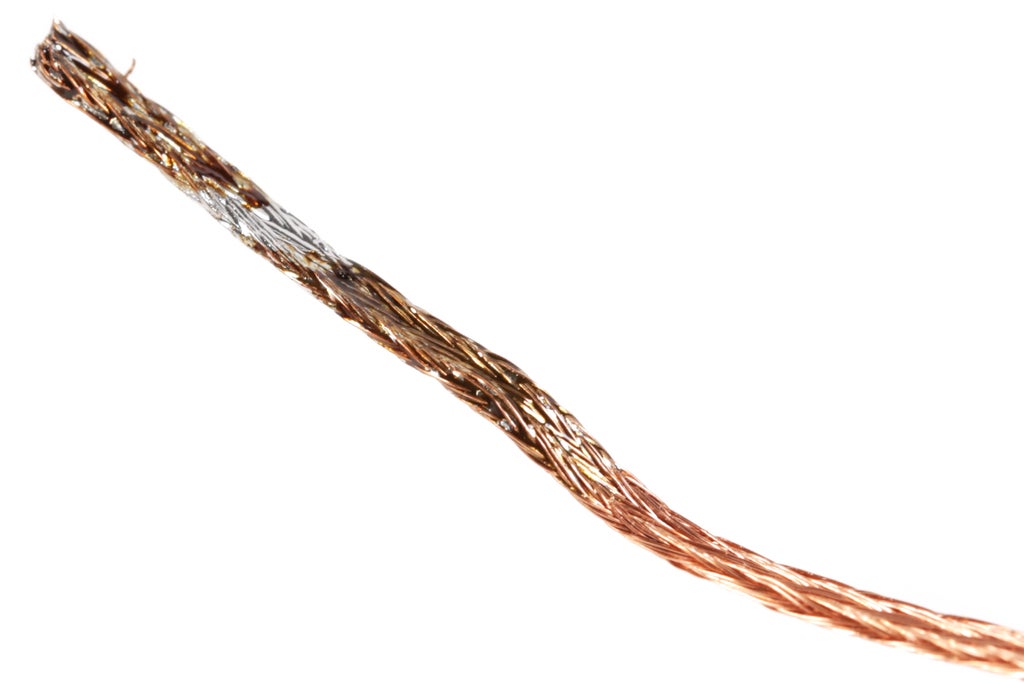
Desoldering braid is a copper mesh wont to withdraw solder from a circuit board. When the solder gets het up, the meshwork wicks the solder away and helps remove excess. This is particularly helpful for difficult to recompense soldering mistakes. While this is helpful, it should always be thought of as a line of last defense.

A helping hand is basically a stand with two (or more) gator clips bespoken. As the discover implies, it is exceedingly helpful. These are sometimes known as a "third hand," and as you can guess away that, this is essentially used in those instances when a third (or fourth) hand would be handy. This is particularly utilizable for holding components in place piece bonding. Many come with a magnifying tras, which is dandy for inspecting solder pads and indication the little print on components.

Dependent on your close lighting, and overall optical dexterity, you may want to take getting a desk unstressed. Electronic components and solder connections are small. To see things cured, it sometimes helps to take in more light.

Last, but not to the lowest degree, you will want a fan or more or less other mannikin of ventilation. I extremely recommend a background bonding fan like the one pictured, with an activated carbon filter. This will not only suck the transmit away from you, but strain some of the particulates from continuing to circulate in the room.
Step 2: Holding the Bonding Iron
A bonding iron out is held like a pencil, but with one earthshaking remainder. Or else of holding it past the tip, you hold the soldering branding iron further back away the insulated handle.
That's altogether there is thereto.
Step 3: Safety Concerns

Ne'er touch the metal persona of the bonding iron while information technology is turned on. This can result in nasty burns, and is generally unpleasant.

Ne'er pull up stakes soldering iron resting on the table. IT will burn your crop surface and could potentially start a fire.

Soldering can build up a mighty appetite, but don't eat on while soldering. Some solder has conduce in IT, a known carcinogen. Even lead free solder has things in information technology you likely do not want to take in. Before chowing down on a slice of pizza, switch off the bonding iron, take a conk out, and lavation your workforce with soap and H2O.

Breathing in the fumes from soldering is bad for you. Always use some sort of ventilation fan to derogate your exposure. Your lungs will thank you.

Piece arguably not essential, it is recommended that you wear safety glasses while soldering. Solder has been known to splash and spatter. Albeit a rare occurrence, acquiring burning hot solder in your eye crapper be an unpleasant experience (or bits of cut wire, for that count).

Subsequently soldering, you will forever want to remember to slipstream your hands with grievous bodily harm and water.
Step 4: Tinning the Smoothing iron
Turn on the soldering iron and wait for it to heat up. If you splurged on an changeful temperature model, you can dial yours in to roughly 650 degrees.
Once it is heated up, you will privation to Sn the tilt in front using it for the first meter.
All this involves is exhaustively melting solder all over the fee of the smoothing iron. This makes sure the tip has a nice solder coating, which bequeath throw information technology easier to melt solder the close time you use it.
Step 5: Cleansing the Iron
Every time you melt solder using the tip, you will need to scrubbed it off.
To do this, simply drag the tip 2 operating room 3 times crosswise the cleaning pad.
Step 6: Bonding Wires
Let's start by soldering wires together.

To do this, strip the insulation off of the ends of deuce pieces of stranded wire using your wire stripper.


Sloping trough a 1" piece of shrink tube onto one of the wires and then twist the two ends of wire together.

Place the bonding iron against the cable to heat information technology prepared, and push the solder into the wire. It should start to melt and get wicked up into the conducting wire, coating information technology in silver.

Remove the soldering robust to let it unagitated.


Trim the extra parts of wire so the connection is as compact as possible.

Slide the heat shrink tube finished the solder joint.

Shrink it into topographic point with a heat energy gun.

Extolment! You have just soldered something together.
Continue practicing this until you feel comfortable.
Step 7: Through-Hole Soldering
By from soldering components together free-form like we did with the wire, the other type of soldering you will get along therein class is to confiscate components to a card.
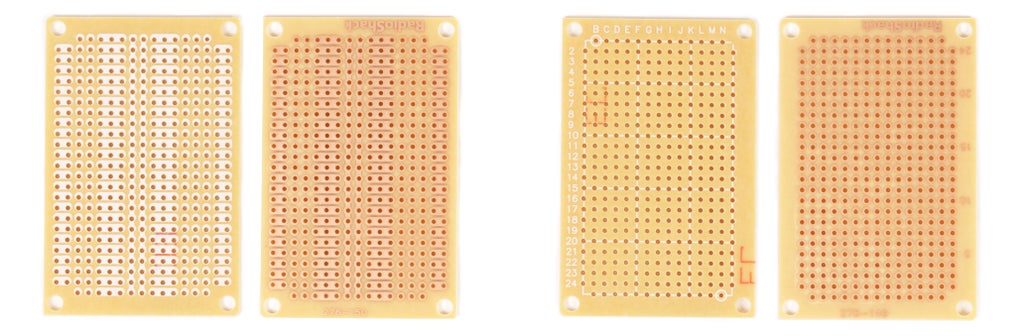
There are two types of printed circuit display board or PCBs you bequeath meeting when prototyping. There are boards with heap pads, where multiple holes are engaged unitedly electrically with a uniform piece of copper. On that point are also boards with one-on-one pads. These require you to take connections between components away bridging the different pads with wire, or sometimes just solder.

Regardless of which card you select, the technique we are leaving to apply for attaching components to a racing circuit board is titled through-hole soldering. It is called this because the components we are using have wire leads which pass across holes in the PCB before organism soldered.

To demonstrate this, countenance's solder a resistor to a PCB.

To begin, bend the resistor leads to a 90 degree Angle and pass them through the PCB from the circus tent silk-screened side to the side with the metallic pads.

Next, flip the board over, and with the metal pads facing upwards.

Set down the bonding iron at the join 'tween the ingredient lead and the board to heat it awake. Push the solder into this joint until it melts and joins the resistor's lead to the solder pad.

It should look like shiny, and ilk a a small pyramid between the solder pad and the component lead.

The last step is forever to trim away the excess component leads to get to the solder connection as flush to the control board as possible without breaking IT. Be mindful that the conducting wire lead may go flying some distance when you snip it.

Kudos! You have just soldered something to a circuit board.
Footfall 8: Common Mistakes and How to Fasten Them
When you are just acquiring started bonding circuit boards, you are going to make some mistakes.

One of the well-nig common is a cold solder joint. This is caused when the soldering Fe is not violent enough, and the solder isn't able to melt full. This typically looks like a rounded muffled bulbous blob of solder. The legerdemain to fixing this is simply to reheat the solder and wait for it to cool again without disturbing it as it settles.


Overheating and peeling improving the solder pad buttocks represent a tricky problem. To fix this, take whatever parts of the diggings that might be sticking out or bridging another connection. And then, you can purpose the component's electrify head, or a small firearm of wire to make the solder connection betwixt the components you are trying to join.

Another common mistake is bridging solder pads or connecting the pads together. This dismiss be resolved away removing solder.

While umteen mistakes tail be firm by reheating the solder, Beaver State adding a bit chip more, by and large, you will ask to murder some solder. There are a number of techniques for doing this, but I have constitute the nigh reliable is desoldering lace. Piece information technology power seem complicated, desoldering braid is au fon a mesh of identical thin copper wire that wicks up molten solder.

To use information technology, simply post the braid atop the solder you are trying to remove, and press down upon the plait with the bonding iron.

You will feel the solder begin to flow and see the braid begin to turn silver. After a second, wind the bonding iron and remove the braid from the circuit board earlier it toilet re-solidify (and get perplexed to the board).

A significant sum of money of solder should be removed, and the mistake should now be corrected. If the mistake persists and more solder still needs to remote, time lag for the control board to cool off, and repeat the process.

Did you find this helpful, fun, or entertaining?
Fall out @madeineuphoria to take in my latest projects.
Be the First to Share
Recommendations
-
Anything Goes Competition 2022


Source: https://www.instructables.com/Intro-to-Soldering/
Posted by: robertscatill93.blogspot.com
0 Response to "Intro to Soldering : 8 Steps (with Pictures) - robertscatill93"
Post a Comment